No matter the brand, ATV tires are built tough and made to last. However, no ATV tire is immune to developing leaks – especially after a long time of use.
While punctures are the most common causes of tire leaks, silent and slow leaks around the rim are quite common as well. These types of leaks are very annoying and frustrating to deal with.
Why do ATV Tires Leak Around the Rim?
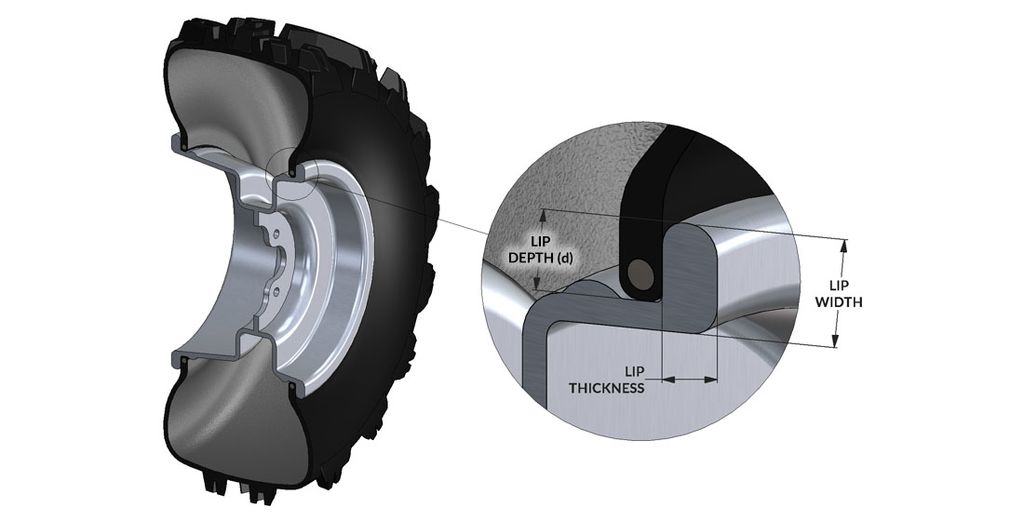
As you can see from the illustration, there are two “lips” on the rim. The small one on the left is called the bead retainer – it keeps the bead of the tire in the bead seat. The Bead Seat is the flat section between the bead retainer on the left, and the big Rim Lip on the right.
Now, the Rim Lip is where the tire is being pushed against and sealed by air pressure, therefore the Rim Lip and the Bead Seat are most likely places for the leak to occur.
There are three main ways that a tire could develop leaks around the tire-rim contact area.
1. Dirt & Corrosion Between the Bead and the Bead Seat
This one is the most common way for ATV rims to develop leaks around the rim, and it’s mainly due to using poor-quality rims.
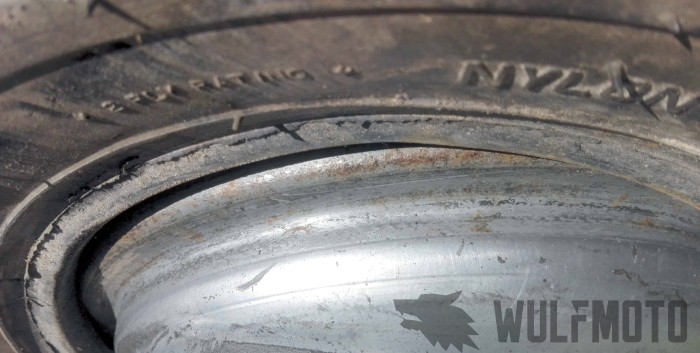
While high-quality rims have great anti-corrosion protection and will last for a very long time, some manufacturers sacrifice longevity to reduce manufacturing costs. Because of that, some ATV rims will start to corrode at the Beat Seat prematurely. Once the sealing surface is no longer smooth, air leaks around the rim will develop.
On the other hand, some rims are coated with a protective layer of paint from the factory. This could be a good or a bad thing, depending on the quality of coating used. If poor quality coating is used, it will start to degrade and will eventually start flaking off. That makes the sealing surface uneven and thus no longer air-tight
Finally, if it’s not due to bad rims, then the most likely reason for the leak would be dirt trapped between the tire and the Rim Lip. Sometimes ATV riders underinflate their tires and aggressively ride through dirt and deep mud – this might force dirt deep between the sealing surface of the Bead and the Rim Lip. The dirt buildup will eventually push on the tire and break the seal just a tiny bit, that’s just enough to cause a slow and annoying leak.
2. Bent Rim
Pretty rare, but not that uncommon for ATVs. If you’re unlucky, you can bend your rim at just the right spot and cause a leak. The worst part is that sometimes, you can barely notice that the rim is bent from the outside without taking off the tire.
3. A Cut in the Bead
Again, very rare, but possible – especially if you mount your own tires without a tire machine.
The Rim Lip can be quite soft and easily cut or scratched by improperly using tire mounting tools. Sometimes, the rim lip can become sharp enough to cut the bead of the tire when you’re rolling it over the rim lip with a prybar. Very difficult to notice and fix.
How to Fix Tire Leaks Around the Rim
With all of that out of the way, let’s get right to the point and get you back on the road. There are two ways that you can go about fixing leaks around the rim on ATVs.
A. Break the Bead, Clean the Surface, Reseat
Unfortunately, this is the only proper way to fix leaks around the rim for ATV tires. I highly recommend doing this job properly, as it most often than not will cost you next to nothing.
With that out of the way, here’s how you should do it:
1. Deflate Your Tire and Break the Bead
To deflate the tire, push in the pin on the valve, or remove it completely with a special tool. Once the tire is flat, it’s time to break the bead. If you have a bead breaker tool or a tire machine – use it, that’s perfect.
However, if you don’t like wasting money and don’t have professional tools, then you’ll need to get creative.
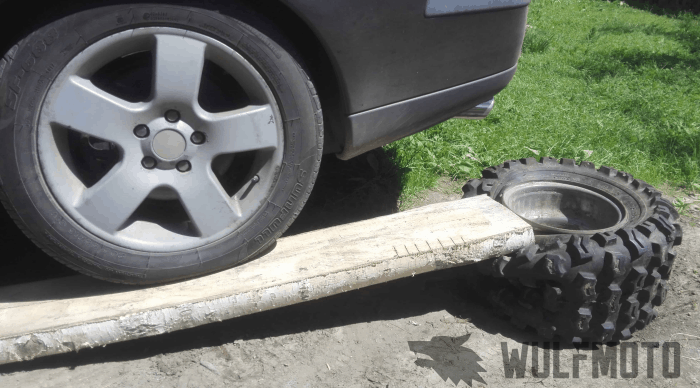
I prefer placing a strong wooden board over the tire and driving over it just enough to break the bead. It looks sketchy but it works wonderfully.
2. Inspect the Bead Seat Surface
This is the most crucial part of the whole process.
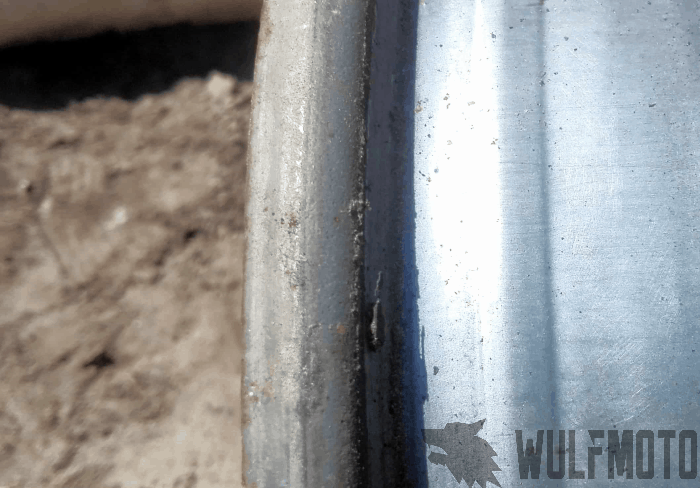
Make sure that the surface is smooth. No cuts, no oxidation (rust), no dents, no low or high spots. If the rim is bent – take it to the tire shop and let them straighten it out.
3. Inspect the Bead of the Tire
Make sure that there are no chunks missing and no cuts are visible.
4. Clean the Bead Seat & Rim Lip
To provide an air-tight seal, the bead seat surfaces and the rim lip need to be corrosion and dirt-free. Even if the surfaces look clean, give them a quick pass with a wire brush.
5. Clean the Bead of the Tire
While it’s unlikely that anything is stuck to the bead of the tire, it’s always a good idea to clean it with some soapy water and wipe it dry with a clean towel.
6. Reseat the Bead
Once the sealing surfaces are clean and smooth, it’s time to reseat the bead. It’s a lot easier if you have an air compressor with an air tank, however, your regular small and portable 12V compressor should work just fine.
The way I do it is I ratchet strap around the middle of the tire tight to help push the sidewall out. Then, I blast the tire with air until it pops and seats the bead. It might take a few tries to get it right.
7. Inflate the Tire to the Proper PSI
Very important. You do not want to overinflate or underinflate the tire.
8. Check for Leaks
Now that the tire is inflated, check for leaks around the rim again.
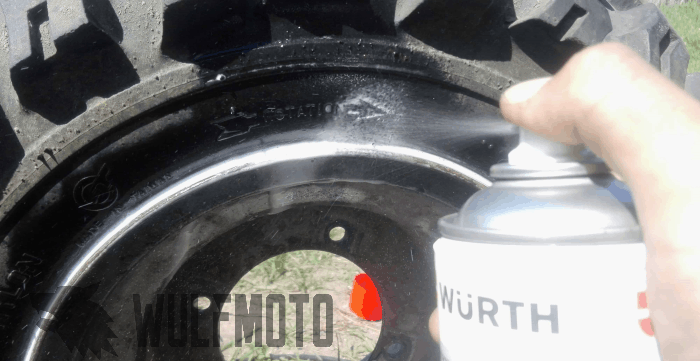
If there are no more leaks and the tire is fixed – hooray! If not, you’ll have to repeat the process or move to option B.
B. Put Slime Into The Tire
This is definitely not the preferred method and it’s better used as a last resort. I’d choose this one if I’m short on time, and do not care about the rims and the tires too much, or the method above wasn’t quite enough.
You don’t have to use Slime, any other reputable tire sealant will do. Always follow the instructions that come with the problem, but just in case, here’s how you do it with slime:
1. Remove the Valve Core
To put tire sealant into the tire, you must let all of the air out of the tire. In most cases, you also need to remove the valve core to help the sealant flow into the tire better.
2. Once the Tire Is Flat, Squeeze Tire Sealant Into the Tire
The right amount of sealant will be indicated in the instruction manual of your tire sealant.
3. Reinflate the Tire
Screw in the valve core and inflate to manufacturer specifications – you do not want to overinflate or underinflate the tire.
4. Roll the Tire Around
When you’re filling the tire up with Slime or any other tire sealant, most of it will just drip down into one spot due to gravity. By rolling the tire around a few times, you will distribute the sealant evenly across all surfaces. That way, the sealant will get into every nook and cranny.
C. Put A Tube In It
Inner tubes can be run inside tubeless tires and rims quite reliably, assuming that there aren’t too many ribs on the inside that would rub with the inner tube.
I’ve personally used inner tubes on my ATV tires when they got way too old and leaky. However, I wouldn’t recommend doing that if you will be going fast on paved roads with your ATV, because the inside of a tubeless tire is quite rough. It’s not a huge problem if you’re only riding around trails and mud, but at higher speeds, that extra friction will create a lot of heat and accelerate the rupture of the inner tube.
To that end, I’d only use tubes inside tubeless tires/rims as a last resort and only if I won’t riding on the streets with them.
Conclusion
Tire leaks are a pain, especially when they’re slow and difficult to detect. There are many reasons why ATV tires start leaking at the rim, but the most common one is corrosion.
No matter the material, all ATV rims will start to degrade over time. Some are better made and last a very long time, while others are not and corrode prematurely.
Fortunately, fixing ATV tire leaks at the rim is quite straightforward and very cheap. It might even cost you nothing at all to do it.
All it comes down to is breaking the bead, cleaning sealing surfaces, and reseating the bead.
Jake is the site’s primary contributor.
Motorcycles and automotive repair have been a big part of his family for generations, therefore it’s only natural that he decided to become a heavy-duty diesel tech.
Outside of work, you’ll find Jake restoring and riding rare street bikes and ATVs.